
How Do You Suction a Tracheostomy Tube Safely at Home
2026-08-19
Caring for a loved one with a Tracheostomy Tube at home can feel overwhelming, especially when it comes to performing suctioning—a procedure that directly clears the airway and prevents life-threatening obstructions. For families and home caregivers, mastering this skill with confidence is non‑negotiable. At HTSY, we understand that safe suctioning is not just about having the right equipment; it is about knowing the exact steps, recognizing warning signs, and building a routine that protects the airway every single time. This guide provides a step‑by‑step clinical approach to home suctioning, backed by evidence‑based practices, so you can deliver care that matches hospital standards in your own living room.
Preparing for the Procedure: Equipment and Environment
Before touching the Tracheostomy Tube, assemble all necessary supplies within arm’s reach. A sterile or clean technique is essential, but home settings allow for a “clean” rather than sterile approach—provided you follow strict hand hygiene.
| Equipment | Purpose |
|---|---|
| Suction machine (portable) | Generates negative pressure (80–120 mmHg for adults) |
| Sterile suction catheter (size 10–14 Fr for adults) | Removes secretions from the tube lumen |
| Connecting tubing | Links catheter to suction machine |
| Normal saline vials (0.9%) | Instill 1–2 mL to loosen thick mucus (only if prescribed) |
| Clean gloves (non‑sterile) | Prevents cross‑contamination |
| Sterile water or saline | Rinse the catheter after each pass |
| Portable oxygen (optional) | For patients with baseline desaturation risks |
Place the machine on a stable surface, check the pressure gauge, and ensure the collection canister is empty. Wash your hands with soap and water for at least 20 seconds, then don clean gloves.
Step‑by‑Step Suctioning Protocol
Follow these sequential actions every time you suction a Tracheostomy Tube. Do not rush—each pass should take no longer than 10–15 seconds.
-
Position the patient – Sit them upright (30–45 degrees) if possible, to promote lung expansion and reduce reflux.
-
Pre‑oxygenate – If the patient has a history of desaturation, provide 2–3 extra breaths using a manual resuscitation bag attached to the Tracheostomy Tube.
-
Insert the catheter – Without applying suction, gently advance the catheter into the tube until you feel resistance (the carina level), then pull back 1–2 cm.
-
Apply intermittent suction – Occlude the suction port with your thumb while slowly withdrawing the catheter in a rotating motion. Do not suction continuously for more than 10 seconds.
-
Rest and recover – Allow the patient to take 3–5 normal breaths before repeating. Limit total passes to 2–3 per session to avoid mucosal trauma.
-
Rinse the catheter – Flush with sterile water through the connecting tubing to clear secretions between passes.
Critical reminder: Never insert the catheter more than 0.5 cm beyond the length of the Tracheostomy Tube—this prevents direct carinal stimulation, which can trigger severe coughing or bronchospasm.
Frequency and Assessment: When Is Suctioning Needed?
Suctioning is not performed on a fixed schedule—it is driven by patient cues. Over‑suctioning can cause mucosal damage, while under‑suctioning leads to mucus plugs. Use this clinical decision matrix:
| Clinical Sign | Action |
|---|---|
| Audible coarse breath sounds or “gurgling” | Suction immediately |
| Increased respiratory rate (>25/min in adults) | Assess and suction if secretions present |
| Restlessness, cyanosis, or dropped SpO₂ below 92% | Emergency suction and call for help |
| Patient coughs out secretions visible at the stoma | Clean the outer area; suction only if internal blockage suspected |
| No symptoms for 4–6 hours | Do NOT suction routinely—monitor instead |
Always document the amount, color, and consistency of secretions. Thick, yellow, or blood‑tinged mucus warrants a call to your home health nurse, as it may indicate infection or excessive drying of the Tracheostomy Tube.
Troubleshooting Common Challenges
Even with perfect technique, you may encounter resistance or distress. Here is a quick reference table for real‑time problem‑solving:
| Problem | Immediate Action |
|---|---|
| Catheter will not advance | Do not force it. Withdraw, rotate, and attempt again with a smaller catheter. |
| Patient turns blue or stops breathing | Pull catheter out completely, ventilate with bag‑valve‑mask, and call 911. |
| Suction machine loses pressure | Check all connections and the canister seal. Have a manual backup suction device ready. |
| Bloody return after suctioning | Stop suctioning. Apply gentle manual ventilation and contact your HTSY clinical support line. |
Frequently Asked Questions About Tracheostomy Tube Suctioning
Q: How often should I change the suction catheter during a single session?
A: You must use a fresh, sterile catheter for each suctioning session. However, during the same session—if you need to make multiple passes (e.g., 2–3 passes)—you may reuse the same catheter as long as you rinse it thoroughly with sterile water between each pass and do not let it touch any non‑sterile surface. After the session ends, discard the catheter immediately. Never rinse and reuse a catheter for a later session, as biofilm formation within the Tracheostomy Tube increases pneumonia risk by over 40%.
Q: Is it normal for the patient to cough violently during suctioning?
A: Yes, a moderate cough is a healthy reflex that helps mobilize deep secretions toward the catheter tip. However, violent, paroxysmal coughing that lasts more than 15 seconds after the catheter is removed is not normal—it usually indicates that the catheter was inserted too deep (stimulating the carina) or that suction pressure is set too high (above 150 mmHg for adults). Reduce the pressure to 80–100 mmHg for future sessions. If coughing persists with desaturation, pause suctioning and administer supplemental oxygen. Always have a manual resuscitation bag nearby when suctioning at home.
Q: Can I instill normal saline into the Tracheostomy Tube before suctioning to loosen mucus?
A: This practice is controversial and no longer routinely recommended by the American Association for Respiratory Care. Instilling saline often dislodges bacteria from the biofilm and pushes it deeper into the lower airways, potentially causing ventilator‑associated pneumonia. Only use saline if a clinician has specifically evaluated your patient’s secretions as “thick and tenacious” and given you a written order. In that case, instill no more than 1–2 mL of preservative‑free 0.9% saline, immediately follow with 3–5 manual breaths, and suction within 30 seconds. For all other patients, humidification via a heat‑moisture exchanger (HME) is a safer, more effective long‑term solution.
Long‑Term Maintenance and Safety Checks
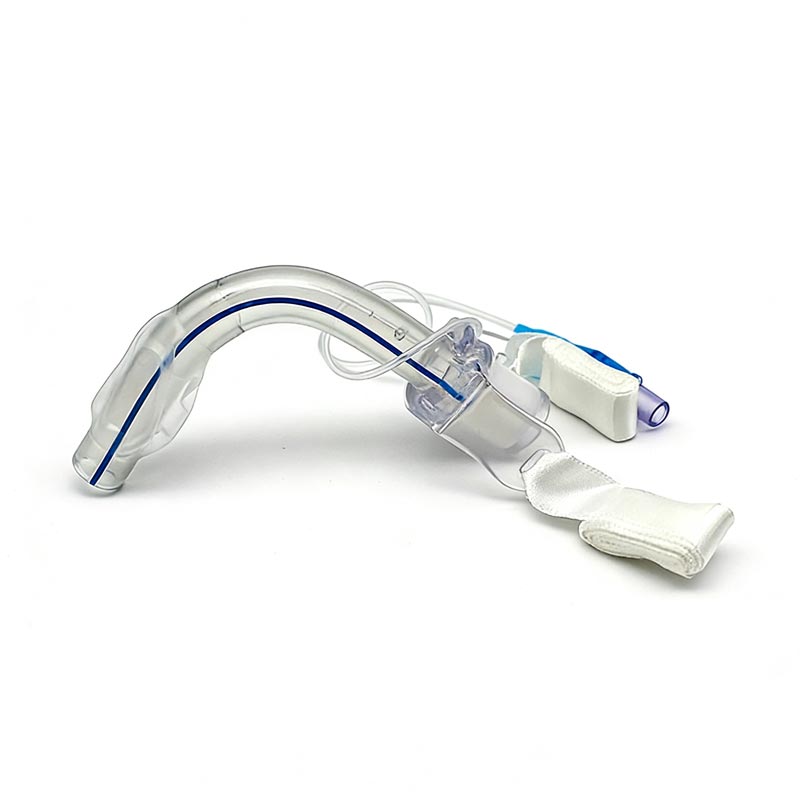
Daily inspection of the Tracheostomy Tube itself is just as critical as suctioning technique. Check the inner cannula (if reusable) for cracks or buildup—replace it every 24 hours or per manufacturer guidelines. The outer flange should sit flush against the skin without excessive redness, swelling, or granulation tissue. Use a tracheostomy care kit from HTSY that includes sterile gauze, cleaning brushes, and securement holders to standardize your daily routine. Replace the entire tube per your clinician’s schedule—typically every 1–3 months for plastic tubes, or annually for metal tubes.
When to Seek Urgent Help
Suctioning is a bridge to safety, but it cannot resolve every emergency. Call 911 or your local emergency number immediately if:
-
The patient cannot be oxygenated despite clear suctioning.
-
The Tracheostomy Tube falls out completely and you cannot reinsert it.
-
There is massive bleeding from the stoma or airway.
-
The patient loses consciousness or has a seizure.
In non‑life‑threatening situations but with persistent symptoms (e.g., fever, green sputum, or worsening shortness of breath over 24 hours), contact your HTSY home care coordinator for a same‑day nurse visit.
Your Safety Partner: HTSY
Mastering home suctioning for a Tracheostomy Tube transforms fear into competence. HTSY provides not only high‑quality suction machines and catheter kits but also 24/7 clinical phone support, video tutorials, and personalized training sessions for every caregiver. We believe that every breath at home should be as safe as the one in the hospital.
Contact us today to schedule a one‑on‑one virtual coaching session or to order your complete home suctioning starter kit. Reach our respiratory nurse team directly at [email protected] or call +1-800-HTSY-CARE. Your peace of mind is our clinical priority—because safe suctioning changes lives, one clear airway at a time.